Thursday, 3 December 2015

Model finished and on display!

The final product is ready to showcase and we also had 2 minutes to present our idea and creation to the other classmates and lecturers:


Things I learned:
  • more confident in illustrator! + more photoshop use
  • learned how to generally use Zbrush and prepare files to be 3D printed (also expensive!)
  • what materials and paints etc work well for making models and how to display them.
  • Form 1 printers give a very nice and smooth model print so there is little cleanup necessary - give them a wash with soap, and maybe clean with isopropyl, sand and cure a bit in the sun but nothing much else.
  • how to create a silicon and resin copy if I wanted to
Things I could've done differently:
  • alternate packaging designs
  • resizing the model so I didn't have issues with putting magnets in the arms / ordering smaller magnets??
  • allowing more time for painting, especially because of the fine detailing needed
  • possibly doing more bogging because there were some chipped pieces from the 3D printing which effected some of the shaping of the model but it was relatively minor.
  • more features, such as a site link, collectable cards etc...
Overall I'm pretty pleased with the outcome of the model so I don't think there's a huge amount that could be changed about it, maybe just adding things to the package or model.

Models primed + design sheet runthrough/final colouring

I primed my models with a grey primer before painting, it helps to add more of a textured coating to hold the paint. It also really brings out the detail (and imperfections :P ):

After painting and then packaging my models I took a photo. The painting I did over 1 evening and the next day. There's some super fiddly bits to detail like the eyes ugh...I think in future I'd like to varnish the model to protect the paint better:


As a general runthrough of what purpose the toy serves/how to play with it and how to put it together + its origin, I have attached my design sheets here:


Refined character sheet final

I wasn't totally happy with my initial character sheet, so I redrew it with my character to scale (on A3 paper) and a coloured pose + large view. It also contains more information about the character:


Final box layout + packaging sheet

Here is my final packaging net layout. I've added a lot more small details into it, in addition, the portraits of the other collectible characters and a copy of the accessories on the back so that the customer will know what should be contained within the package:
Here are the portraits also for a closer view. I vectorised them in illustrator before placing them onto my packaging:
 Here is my final packaging sheet for hand in. I just talks about the aesthetic and relationship between the packaging and figurine/accessories and why I went with the overall design. There is also a rendered view of what it would look like put together:

Wednesday, 2 December 2015

3D printed model

Here is my 3D printed model and pieces after cleaning, bogging and sanding down protruding edges and excess bog.
I drilled a hole for the neck and head to turn in the top of the torso and at the waist there are 2 magnets drilled and inserted with super glue. Unfortunately the arms can't turn because there was not enough room for me to place the magnets into them so I had to superglue them on. The next step is just to prime the model before painting so that the paint stays on well.


Sunday, 29 November 2015

Packaging and logo

I redesigned my packaging because I felt like originally it looked too bright and tacky so now its more uniform coloured and i also discovered some interesting borders in illustrator to use on it. In addition I created the character license logo 'Spooky Worlds' I may end up changing the words but I feel like it looks alright so far:


I still need to create character profiles for the little windows on the back and colour the tabs better.

Accessories

I didn't spend as much time modelling the accessories but I feel that once they are painted up they will look better:


Final Tressil Model

Here's my finalised model for Tressil. At first I forgot to decimate him enough before sending him off for printing so I reduced his size for the final send through with the decimation master. Trying to Dynamesh him resulted in the mesh deforming too much so I ended up avoiding it:


Process clothes and shoes

here I have done most of the clothes and started working on the shoes. I still need to make his hat and fix up my accessories:

Tuesday, 24 November 2015

Clothing - starting to model

I also used the extract mesh for the jacket and collar and I will do it for the pants and shoes also, I might also lengthen the hair a bit more:


Hair development

Here is the development for my hair. In Zbrush I used the masking tool and then extracted the mesh turning it into a subtool for modeling separate to the head and body:


Monday, 23 November 2015

Packaging prototype

Here I started working on my packaging in illustrator and printed it for example assembly, however after assembling i messed up some parts of the packaging so I will fix those when creating my final package:


Sunday, 22 November 2015

packaging pattern

I started a photoshop night swamp image for the backing of my packaging, I will tidy it a bit more but I feel like I can reuse the backing image to make a strong repeating scenery across my packaging, I plan to also have a window for my figure through some of it:


Thursday, 19 November 2015

Tressil base modeling

Here I've been just modeling the outline of Tressil's body shape, the head needs more detail definitely and I will probbaly make it larger/torso shorter to match the initial doll shape:


Wednesday, 18 November 2015

Character sidekick

I made a possible mesh for a character sidekick for my main character which is sort of a swamp dragonish thing, I may or may not use it as an accessory if I can figure out how to place it into my main character file:


Tuesday, 17 November 2015

Zbrush starting to model

Here is the beginning of my model in Zbrush, just the Zspheres for the base of the figure so far:


Sunday, 15 November 2015

Other Colour options

I've tried out some other colour schemes on my character, he may also have other optional costumes based on 1 or 2 other palettes here:

The ticked ones are the ones I liked and coloured his face and torso with..


Character license update

After talking to a few people my first character wasn't as colourful or interesting for a younger audience, so I decided to pick an older character that I had created: Tressil


Character rundown:

Tressil:

A trickster and hypnotist, Tressil resides in the Blackwater swamp, which used
to be a once green and natural region, abundant with life. Both he and the other beings
living in this area have been cursed with sickness and to remain there until they are no
more. The curse was caused by an angel that noticed Tressil was dealing in dark magic,
and branded him a witch of the swamp. The angel made him responsible for the 
suffering he has caused to the others around him there.
To lift the curse he appears to those that enter his domain and befriends them, 
offering them what they desire in turn their soul. His desire is to use the souls for a 
spell which will restore his region to its former state and heal the sickly residents.

Possible accessories: Hat, Clock pendant, Staff, Jar of souls?, sidekick?

Possible other characters: swamp residents, hero/protagonist, angel

Wednesday, 11 November 2015

Character license

After some consideration I've decided to go with my own character license because I would really like to model one of my own action figures, with movement in the shoulders, neck, waist and possibly legs. I am considering modelling him in zbrush for my figurine and 3D printing the model in sections.

I've thought about using a QR code to connect to a character Bio page or an animated short or something for the character, and using magnets to connect some of the limbs or a combination with ball joints or pinned hinge joints in the legs and neck.

Florian: + accessories are knife, gun and robotic mask


Magnetic Joints?

I also discovered a model with magnetic joints while looking up the BJD website which I might consider using instead:

They could be inset glued into the model and then it would also be easier to move the limbs and detach if needed.

Monday, 9 November 2015

Joints for the figure

I want my figure to be semi-movable so I'm considering ball joints, swivel joints or possibly hinge joints which could be drilled with a pin if need be.

 ball:
swivel:
Door style joint:

A pretty good overall explanation of different types of joints in the body, handy for reference when modelling:


Inspiration for character license


I'm really interested in doing a relatively simplistic figurine but with a technological aspect such as having a USB hidden inside the figure that contains a series episode or short game or a playable character, level or enemy update for a game.

So far I've been interested in an indie game I've played called OFF! - OFF! game site images also here: Mortis-ghost store , because of the character style which I feel is effective as toy design which also has interesting accessories:


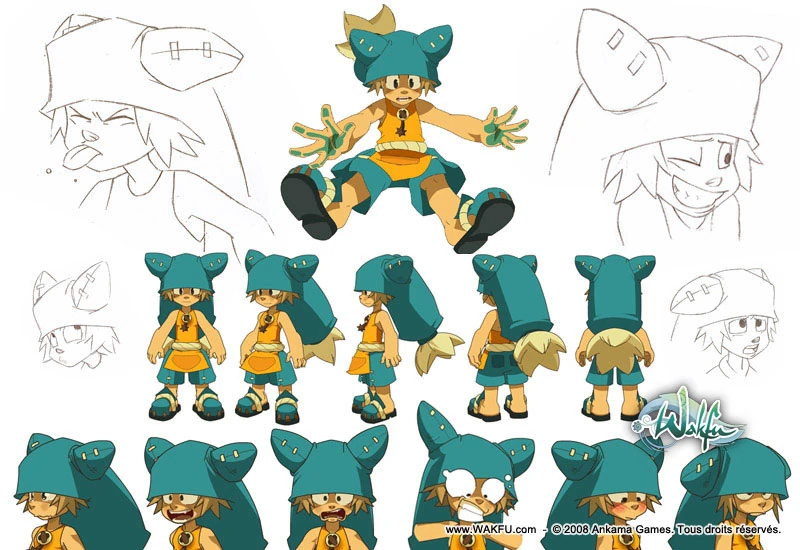
....or Wakfu, a game and now animated series also with simplistic and expressive characters, which I've also started watching:


Wakfu Game
Wakfu TV series